Discover the Magic Eraser
| The magic eraser tool can be a nice and quick tool to use in the
right circumstances. Start out with a clean background image.
This tutorial will help you to better understand it. I recommend that you duplicate the background layer first, by dragging it to the new layer icon at the bottom of the layers palette.
Now you have a layer on which it’s safer to eraser or shift
pixels on.
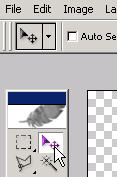
Now make sure that you are on the duplicated layer. When a layer is highlighted in the layers palette it means that it is the ‘active’ layer and the one that you are working with or on. Now with your magic eraser tool just go ahead and click on the background area. In this case I have a photos.com image that has a nice simple background. This you will find simple backgrounds to work out the best when
using the magic wand or magic eraser. In any other
circumstances, this tool could be considered as the 'tragic eraser'.
The point where you click is used as the reference point from which the eraser will be done.
The tolerance level is how great of a variation in pixel color you can have to be included in the erase.
Once again contiguous means pixels that are touching each other. So if there’s no interruption then all of the pixels in the area will be affected (see the background eraser tutorial for further explanation). In this case of the magic eraser it’s ok to leave it on contiguous because you’re not limited by the size of a brush; it will eraser all pixels in the surrounding area of the entire document that aren’t blocked by another color. I’ve basically ‘erased’ this complete background with one click because the background was one single color and much different than the sharp colors of the subject (this creates a great contrast so it’s easy to use a simple tool like this here). Use the move tool and move the layer around.
By erasing the background what you have left is basically a selection of the main subject. In the layers palette, this is the only pixel data that is actually on the layer (which is also the end result of making a selection with this means to an end).
For mastery of Photoshop itself; it's going to take dedication and some comprehensive training. You're not going to find free complete training anywhere. Take a look at my Photoshop CS video tutorials training and see where it can take you. |
TUTORIALSTRAINING.COM
& TutorialKey Solutions c/o DreamCore Productions, Ltd.
5140 STONEY BROOK RD. RUDOLPH, WI 54475
715-423-2161
Contact me for any questions.
|
Copyright TutorialsTraining.com & TutorialKey Solutions 2005 Adobe, Photoshop, and the Adobe Certified Expert logos are either registered trademarks or trademarks of Adobe Systems, Inc. in the U.S. & other countries. Adobe Product Screen Shots reprinted with permission from Adobe Systems, Incorporated. TutorialsTraining.com & TutorialKey Solutions, PhotoshopDesigner.com, PhotoshopDesign.Net, ClubCast.tv, PhotoRestorationTutorials.com, PhotoRetouchingTutorials.com, Digital-Scrapbooking.net, Scrapbook-Templates.com, are trademarks of DreamCore Productions, Ltd. U.S.A. NAPP is a trademark of PhotoshopUser.com. Use of other trademarks or logos does not imply endorsement from the respective sources. |