|
Introduction to the Quick Mask
Mode
This is an important tutorial because it is introducing you to
the quick mask.
The quick mask is a powerful way to get great
selections accurately
and it's very flexible.
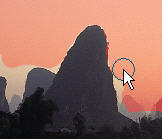
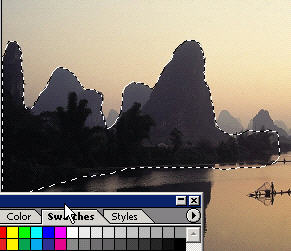
First start off with the lasso tool
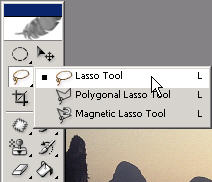
and make a very loose selection around an object
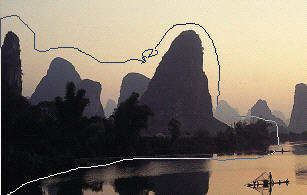
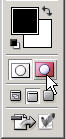
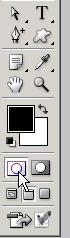
Now that you have made a selection, you can view it at any time
(and do
further editing) in the quick mask mode. To enter the quick
mask mode
press the icon as shown right here (you can also toggle
between regular
and quick mask modes with the 'Q' keyboard
shortcut).
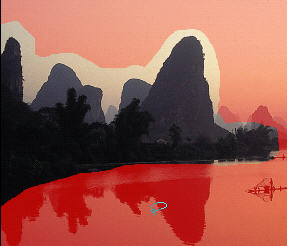
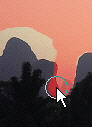
When you enter the quick mask mode you get a
rubylith. This shows that
areas that are de-selected
in Red and the areas that are selected as
untouched or
clear.
You can further edit your selection in process (the quick mask
becomes
a temporary channel in the Channels palette and is gone when
you exit
the mode) by a number of ways including selection and
filling (combined),
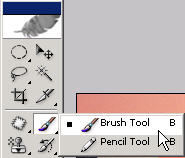
gradient and using the brush tool (most common).
Select the brush tool
while you are in quick mask mode.
You can change the size of your brush in the brush dialog box in
the options bar. Basically what you're going to do is 'paint in' the
areas that you want to deselect.

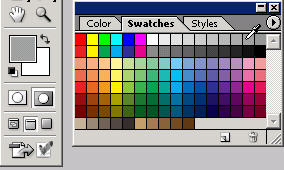
In order to do this you also have to understand that black must be
the
foreground color in order to paint in red (don't let this
confuse you...if the
rubylith was black you wouldn't see anything)
to deselect. To RESELECT
you use white as your foreground color with
the paintbrush. This is a very
important concept I refer to often:
Black hides pixels. White buys them back.
It could take
you a long time to get comfortable with this in an
operational
proficiency.
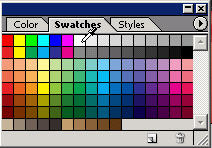
Also, when you choose any shade between white and black you will
get
different levels of opacity in the resulting selection. The
closer to black
you are the more invisible the pixels and the closer
to white the shade
of grey, the more visible the pixels will be.
White is pure original pixels ("buys back" your pixels)
and black is pure hidden (masked) or invisible.
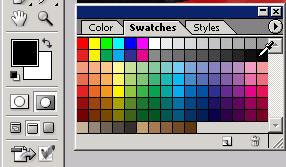
Because the quick mask is essentially a
grayscale alpha channel, no
other colors are involved, just white to
black and shades of grey in
between. These are what you will ‘paint'
with in order to select or
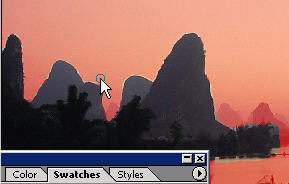
deselect. Now just take your brush with black as the foreground
color and
fill in the rest of the sky carefully.
The rubylith just shows you the actual job that you are doing.
Feel free
to lower the size of the brush to get into smaller areas
(use the bracket
keys [ ] to make the brush size larger or smaller).

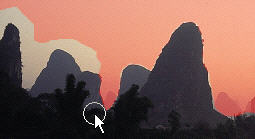
If you accidentally (or purposefully) spillover and deselect an
area with red
use the shortcuts of D,X to switch and get white as
your new foreground
color. With white remember you are buying back
pixels, or preserving them
in the ultimate selection, so just eraser
the red rubylith to where it spills over
into your mountain or
selection object.
It might take a few minutes depending on the type of selection
job and
complexity (even for pro's) but learning this 'quick mask'
method is really
a time saver. Try using the rectangular marquee to
get a selection like this (yikes).
Remember that you can also
combine other selection tools and you can use
the gradient tool,
making selections in the quick mask mode and then filling
with
either white or black or your shade of grey.
You can also enter the
quick mask mode from scratch without first making any selection (not
recommended) and then you can use a large brush to just start
deselecting areas to close in around your selection with black as
your foreground color.
Press the Edit in standard mode button
or Q to exit quick mask, delete the temporary channel (which will
return
once you enter again) and see the selection job that you have
created.
You can always enter quick mask mode again to keep working on or
editing your selection. I much prefer the quick mask mode personally
than to edit selections by making them into work paths and using pen
editing tools. With the brushes it usually gets a great selection
every time with nice clean edges.
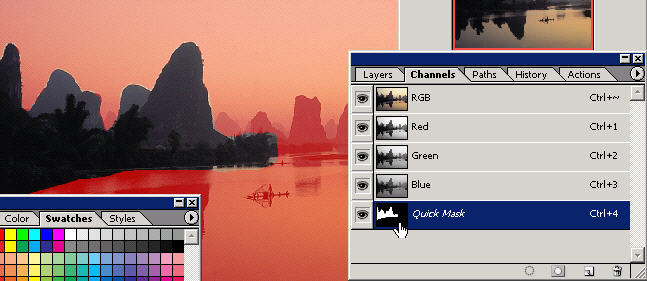
Here is the view of the quick mask mode in the Channels palette
where
the temporary channel (alpha) is created. Note that the black
area is
deselected and the white area is the ‘selected' portion. The rubylith
simply allows you to view your selection job in progress.
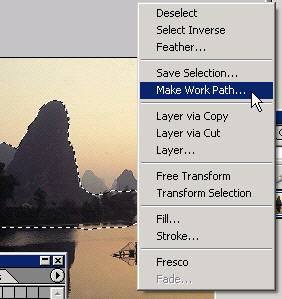
Remember that you can also right click in standard mode (with
selection
tools such as the marquee...) to choose make work path.
This is covered
in another tutorial and is another (harder) way of
editing your selections/paths.
By using brushes
instead of a shaky lasso tool you can have a lot more
control over the selection and
ultimately, the extraction that you're getting.
This means if you're extracting an
object, person, mountain, animal (or most
anything) you can get it faster and
more precise with cleaner lines to then
move it to where you want it and do
with it what you have planned.
You'll
really want to get really good at getting selections so
you can move
your
people, subjects, main characters, etc. where you want
to in a design
or
photograph.
To fully master the quick mask mode
will take some more education
as well as some application on your
part but it can be a GREAT tool
in your arsenal of getting fast and
accurate selections.
There are
just a million more little things like this that you
could learn that
you won't
find on other online tutorials.
I want you
to think about where you're at and what you want to get
out
of
Photoshop. Do you feel limited by the free
information you've been
presented
with online so far? Do you know it's only part of
the scope of
your
potential?
On the next
page I'm going to show you how you can achieve digital
imaging
editing
results in any area that you might be interested in.
I'm talking
about the
Photoshop results of your dreams and without
limitations.
Getting what
you want out of Photoshop CS/CS2>>
___________________________________________________________
Copyright TutorialsTraining.com &
TutorialKey Solutions 2005
Adobe, Photoshop, and the Adobe Certified Expert logos are either registered
trademarks or trademarks of Adobe Systems, Inc. in the U.S. & other countries.
TutorialsTraining.com & TutorialKey Solutions,
PhotoshopDesigner.com,
PhotoshopDesign.Net,
ClubCast.tv,
PhotoRestorationTutorials.com, PhotoRetouchingTutorials.com, Digital-Scrapbooking.net,
Scrapbook-Templates.com, are trademarks of DreamCore Productions, Ltd.
Use of other trademarks or logos
does not imply endorsement
from the respective sources.
Privacy Policy
|